
The REV System for CNC Milling Machines
Considerably Faster with Remarkable Precision
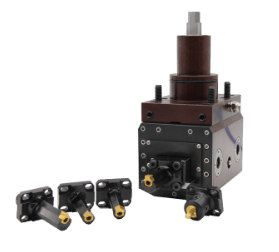
The REV Broaching Tool can be used for processes requiring straight cuts, such as broaching tab or key housings directly on CNC lathes, machining centers or milling machines. These operations are performed considerably faster and with remarkable precision. Ideal for both single and timed or multiple cuts. Inserts and tools are available to cut, square, hexagonal, pentagonal holes and involute teeth, as well as keyway slots, and PTOs. Also, available with quick turn-around of inquiries and orders are special inserts and tools based on specific customer demands. The REV Broaching Tool allows broaching and slotting to be carried out directly on CNC machine tools without setting up other machines or having to sub-contract the work. It guarantees an excellent finish and always perfectly with in tolerance. In addition to offering these significant advantages, work can be done within the same coordinate system. Used on slotting or shaping machines, the REV tool represents an excellent substitute for traditional tools, as it offers greater versatility thanks to the re-usable tool body and the replaceable insert.
For machines that do not feature a spindle alignment function, REV technicians have developed an alignment plate to achieve correct assembly of the REV Broaching Tool on machining centers and milling machines. It is a calibrated bar that needs to be assembled in place of the insert, with a centesimal dial gauge sliding along it (or millesimal, if greater precision is required). When the tool has been centered in relation to the reference axes of the workpiece, the cutting tool can be re-assembled and processing can begin.
1. Assemble the tool directly on a Weldon fitting (we recommend one with an internal supply)
2. Position the selector on MDI and place the machine in spindle configuration (for example Fanuc M19);
3. Place the aligner plate in the insert housing and, using a gauge or comparator, slide the axis along the flat surface of the plate until you achieve perfect alignment, parallel to the direction of operation
4. Tighten the bolts on the Weldon fitting so as to clamp the tool on, then remove the aligner plate and put the insert in place